
How to update the driver for NP-2500?
Method-1(Windows/Mac/Linux)
① Open Realtek website driver download site.(NP-2500 DRIVER)
② Find the system that needs to download the driver.(PS: NP-2500 chip model is 8125B)
③ Download and open.
④ Follow the instructions to complete the installation.
⑤ Reboot the device.(PS: The newly installed driver needs to be restarted to use the driver)
Method-2(Synology 918+/3615 DSM>6.2)
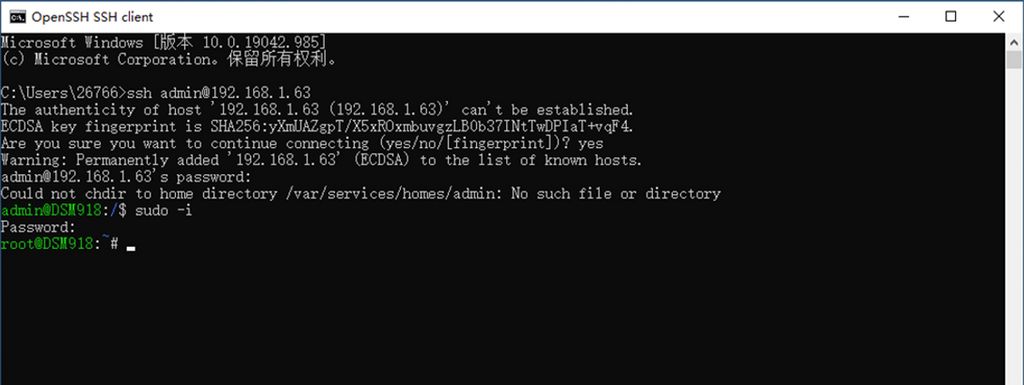
① First connect with Synology,Hold down the "Win+R" keys, type cmd, and type ssh "your Synology id"@"your Synology address" Enter the Synology password, enter "sudo -i", enter the password again, turn on the Synology root mode.
② After entering SSH, modify "vi /etc.defaults/synoinfo.conf" and "vi /etc/synoinfo.conf" respectively, pull down, find maxlanport, and press i on the keyboard to change 2 To 4, then press esc, and then directly enter ":wq" to save.
③ After modifying the number of network ports, Turn off Synology, plug in the network adapter to connect to the Internet cable, you will see this adapter on the network device.
Method-3(Qnap=Drive-free)
Method-4(ESXI 6.7u3)
① First, download the ESXI drive 6.7u3 / WinSCP / MobaXterm
② First, open ESXI, find Troubleshooting Options-Shell, open SSH.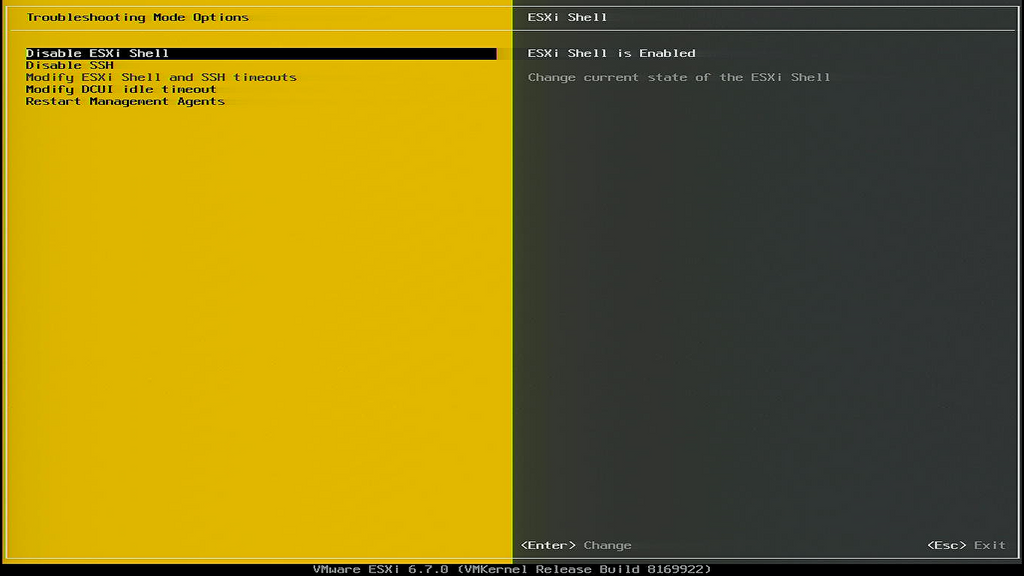
③ Next, open the tool WinSCP, find the driver to be installed on the left, log in to ESXI on the right, find the tmp folder, and upload the driver to the tmp folder.
④ Next, open the MobaXterm tool, click "Session" in the upper left corner, select SSH, enter the host address and user name, and click "OK"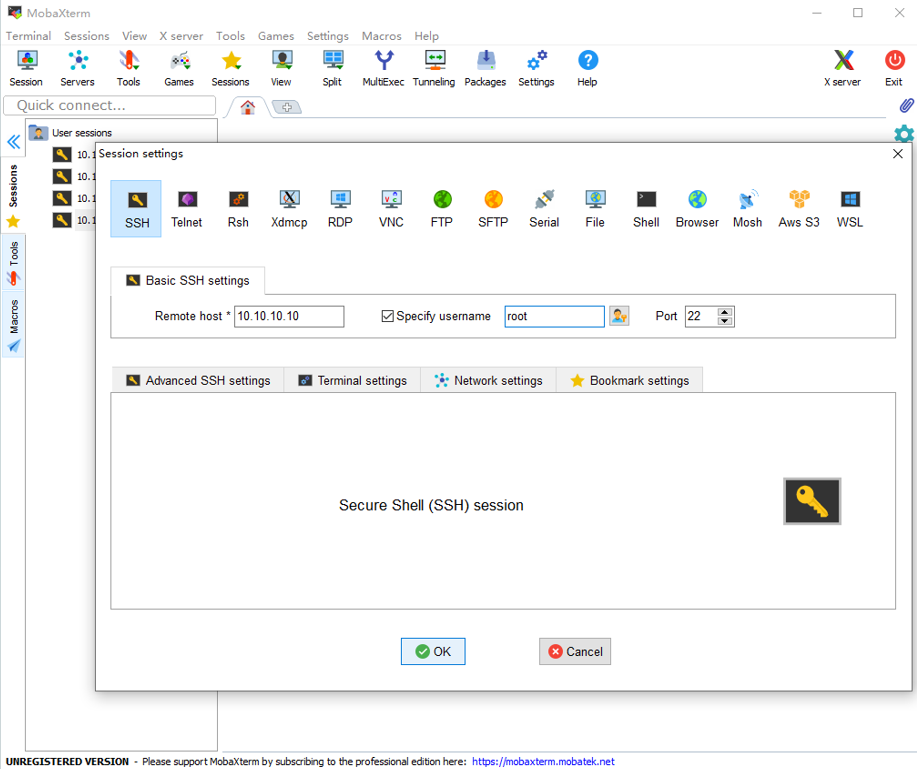
⑤ Enter the ESXi password in the dialog box to log in. After logging in, use the "ls" command to check whether the previously uploaded driver package is in it, enter "cd /tmp" to enter the tmp folder, and then enter the command "esxcli software vib install- v /tmp/The name of the driver installation package", press Enter to install, and after a period of time, Successfuly pops up, which means the installation is successful.
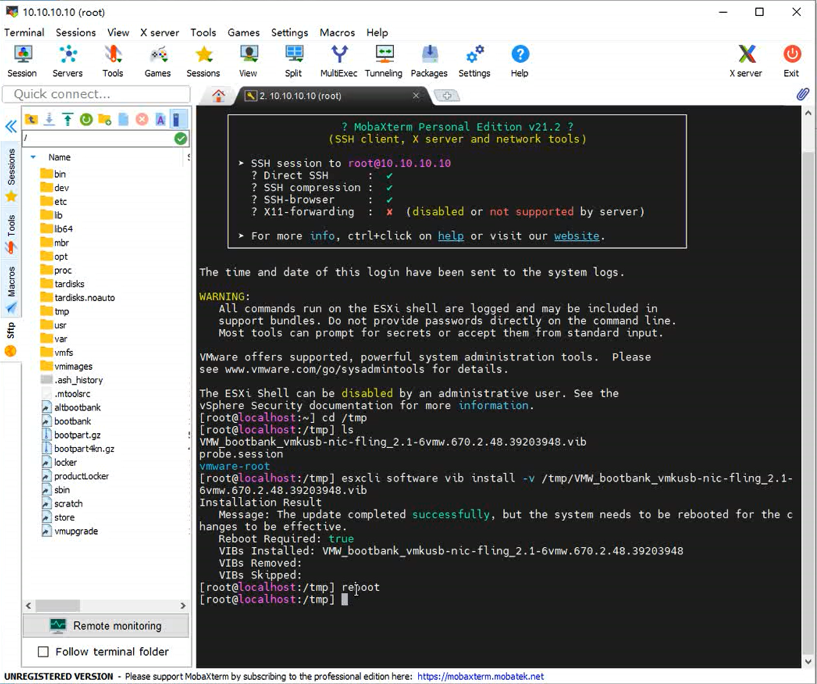
⑥Finally, enter reboot to restart ESXi, and insert the 2.5G network adapter in advance, after restarting, open the browser to log in to ESXi, and see that the inserted 2.5G network adapter is enabled on the network interface.
Method-5(PVE>7.0 Drive-free, PVE 5-6 Driver)
① First, download the PVE 5-6 DRIVER
② Then, you need to enter PVE and log in, find the Shell panel.Type "apt-get update" and press Enter and wait for the loading to complete. After loading is complete, enter "apt-get -y install git" and press Enter.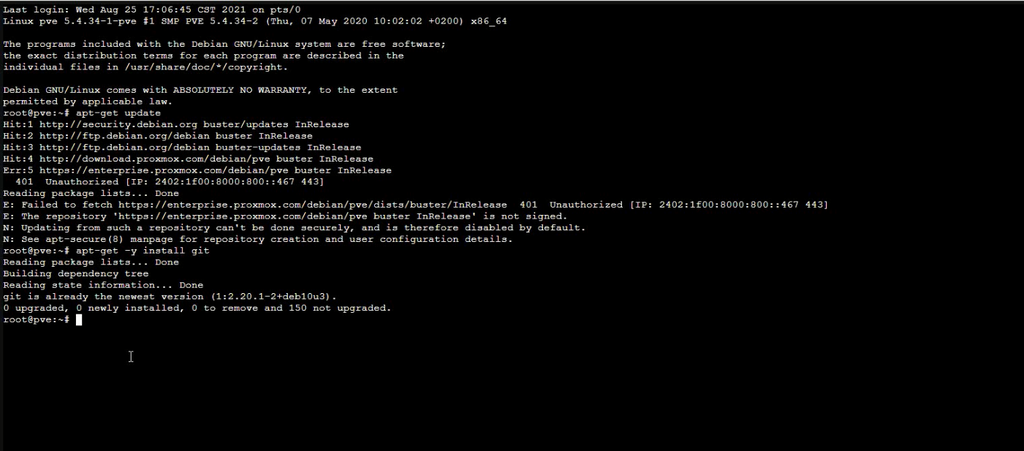
③ After loading, enter "git clone https://github.com/tubaxiaosiji/RTL8125-Driver-for-Proxmox-VE.git" to download the driver file. After the download is complete, enter "cd ./RTL8125-Driver-for-Proxmox-VE" to enter the downloaded driver folder.Enter "chmod a+x rtl8125_install.sh" and "bash rtl8125_install.sh" to install the driver.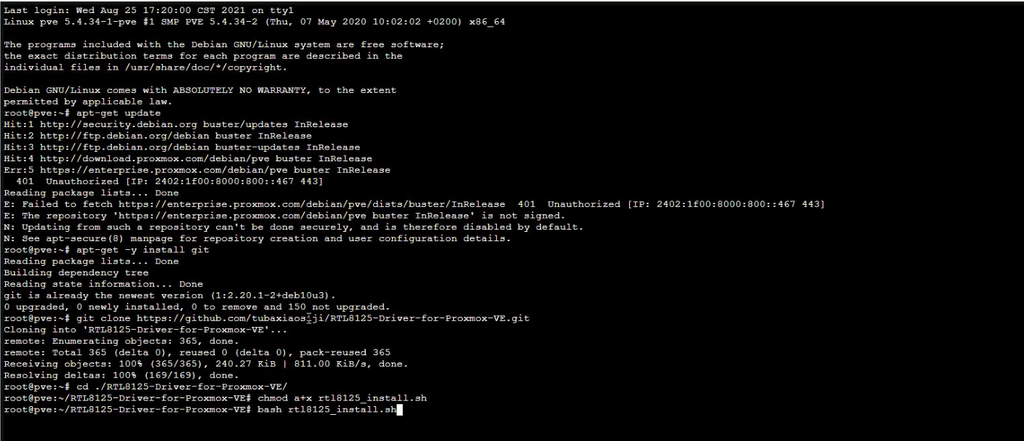
④ After the installation is complete, it prompts that the installation is successful, and finally enter lsmod | grep'r8125' to check whether the driver is normal, and finally open the network, you can see that the 8125B network card has been displayed.